Manufacturing a Dutch tool cabinet is a good exercise in various types of joinery. It also provides a location to keep a full furniture manufacturing shop's worth of hand tools on the road. See how I repurpose a bookshelf into a Dutch-style tool chest step by step.

Why I adore This Work
My friend Isaac is going to need a place to keep all of his restored tools, but the real impetus for this project came from the fact that I already had plenty of bookshelves lying around from a previous project I did while teaching at the Port Townsend School of Woodworking. Woodworking is great because it is nice to give old furniture, materials, wood scraps, etc. a second chance at usefulness. That is the purpose of this toolset I am constructing.

Examining Materials from Various Angles
When I looked at the dovetailed bookshelf that I no longer required, I realized I could simply flip it upside down, cut an angle on the top, and construct a Dutch tool chest out of the wood and joinery I'd already made in that way. The video above does not show cutting the dovetail component of this project because it was already at this level.

Creating a Dutch Toolbox
1. CUTTING THE TOP ANGLE
The first step in transforming this bookshelf into a Dutch tool chest required me to cut a 30-degree angle into both sides of the bookshelf.
2. BACKING WITH TONGUE AND GROOVE
I then trimmed the tongue and groove backing for the torso. This backing is present to enable the back panels to expand and contract. During seasonal wood movement, the tongue-and-groove joinery will prevent the timber from splitting or twisting.
We've also used spacers to keep these apart, again allowing for expansion and contraction.

3. CUT NAILS VS. SCREWS
Many individuals will question why I used cut nails instead of fasteners to construct this tool chest. The straightforward truth is that they do so because it is customary, but they also create their form of joinery. We want to position the cut nails so that the broader portion of the nail aligns with the direction of the board's grain, causing the nail to wedge into the board. (This also reduces the likelihood of timber splitting.)

4. CHAMFER PLANE FOR DETAIL
I additionally chamfered each of the planks with a chamfer plane (this step is entirely optional). There will be a little space because I used a spacer, and I think that looks a little odd if you don't create other visual interests around it; therefore, the chamfer plane makes perfect sense.
5. RACKING
Yes, this tool chest design has only two dovetails on each side, which is a potential structural weakness. However, we will have nailed portions on both the back and front surfaces, which will eliminate the possibility of any racking.
6. SECRET FALL FRONT
The top front panel is nailed in place, and this serves as a key that enables the bottom front panel to open by falling away, exposing a hidden compartment for additional tool storage.
7. MAKING THE "KEY"
I began by resawing a piece on the bandsaw to produce the key, which was the initial phase. I proceeded to drill a small finger hole or handle hole. Then, I was required to create a small composition for the autumn front. I rounded off the borders to make it more aesthetically pleasing and had to route slots in all three locations where it will reside.
I use a handsaw to cut these sides because I never trust myself with a router and a piece that is already part of the finished product.
8. SLICE THE ANGLE
I utilized my palm router to route out all areas requiring refuse excavation. I just rough-cut this angle on the table saw and will soon refine it with a hand plane. I desired to leave both extremities a bit longer so that I can use a hand plane to smooth everything out later.
A benefit of woodworking with hand tools is that you have a little bit of wiggle room after the project if something doesn't turn out perfectly square. But undoubtedly, you should always strive for perfection if possible. Consequently, I want this tool chest to be symmetrical in every aspect.

9. PRE-DRILLING
You observe that my incision is a little too high, so we will lower it with a hand plane. If you're a masochist like me, you can use a hand conventional power drill for this section. Because of the nature of cut nails, I feel compelled to use a hand drill when working with them. A final note about the drill bit is that it is roughly half the size of the nail at its midpoint.
Therefore, we must obtain the dovetail strength from the triangle shape of the fastener without completely severing the piece. As I'm nailing this, I'm taking care to position the nail so that it can penetrate the timber without causing it to split at its weakest point.
The first nail will be hammered in, followed by the nail on the opposite side. We want to ensure that this first one goes off without a hitch. As a pro tip, when hammering, you should always be as near as possible to one of the legs of your benches to maximise the purchase of each nail strike.
10. CATCH FOR THE FALL FRONT
The next step is to construct a small catch for the front of the fall front. I simply cut a piece of wood to size and attached it with a power drill.
11. CONFORMING THE FINAL PART
Now comes a very intriguing piece of construction that fits this final piece. Be sure to watch the video to see precisely how I measure and mark the piece to determine where to cut it and how I mark it again to return with a hand plane to make the piece fit.
12. PREPARE OF THE FINAL WORK
This final piece must be placed at an angle to allow it to open and close while remaining flush when closed.
13. BACK ENDS
Now that the final piece is in place, we will construct the back ends. To secure it, we will make a couple of incisions inside the piece, ensuring that they are flush with the surface. (Watch the video to gain a greater understanding of this section.)
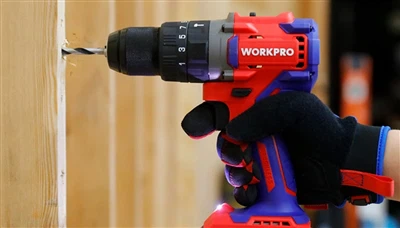
14. USING WORKPRO GLUE IN THE WOODSHOP
Workpro glue may seem like an odd choice for a project involving traditional hand tools, but there are times when I need fast clamping pressure and don't have time to let traditional glue dry overnight.
Ultimately, the nails will provide the holding power for this piece, but I use a thin bead of glue to keep the piece in position while I hammer in the nails.
I can proceed to nail it in place as it's fairly secure in a matter of seconds. While we are nailing it into position, I need to account for the width of the chest wall. I want to ensure that it is positioned properly. The final stage involves attaching the key holder to this component.
So, I simply insert it and adhere it along those lines. Now, we're going to clamp this in position, as we want this to have a very strong connection. I'm applying a clamp to this to ensure absolute, uniform adhesion.
I neglected to drill the opposite side of this hole when I was performing the dry boring procedure. So, when I attempted to drive the peg in, I drove out the entire piece of wood. With Workpro Glue, I was able to rapidly grab the splinters of wood that flew out of the hole, re-insert them, plane the piece, fill the hole with wood filler, and have a fully repaired piece within minutes. Once the top of the sarcophagus has been painted, you will never see it again.
Now that our aperture is completely secured, we have every component for a complete chest. The handles for this chest will be forged by hand, so that portion of the construction will not be shown here. If you want to see how I forge chest handles by hand, you can watch the video on my YouTube channel.
15. FITTING THE INTERIOR OF THE CHEST (also referred to as FRENCH FITTING)
We will immediately proceed to fitting the interior of the chest. The most entertaining aspect of this tool chest is the extraordinary number of tools it can store. I mentioned in the introduction that the chest can hold an entire workshop's worth of equipment. However, if you plan to transport your container from one location to another, you will need to organize your belongings. If we only had it in our shop, we could place our tools in it.
But because I frequently take my chest on the road when I'm teaching classes or whatever else, I want to ensure that every single tool not only has its place so that I can see if something is missing but is also securely placed in its place so that it doesn't get jostled while I'm traveling.
Numerous individuals refer to this procedure as French fitting. Essentially, you are creating a special hole for each instrument and then arranging them so that they fit in the chest in a very specific manner. Now, this procedure is extremely specific to the instruments you are storing in the chest. I've included a video depicting the contents of my Dutch tool chest, but yours may appear entirely different depending on the tools you own.