Sausage Caulking Gun
Occasionally, repairs such as sealing certain materials at home and at the workplace are necessary, and a sausage caulking gun is an ideal instrument for closing undesired gaps and holes. A sausage caulking gun is a fantastic addition to your toolbox, and since it is considered an investment for hardware enthusiasts, it is prudent to choose the best caulking gun available. You must ensure that it is worth the money you are paying for it, and that it can provide when sealing tasks are required. Here are some variables to consider while purchasing a sausage caulking gun.
The thrust ratio: This is the measurement of the force that is applied to the tube piston each time the trigger is pulled. Depending on brand and size, the thrust ratio of the majority of caulking guns ranges between 3:1 and 18:1. The thrust ratio of sausage caulking guns should be as high as possible, as this will allow the adhesive or caulk to be distributed more rapidly. This provides you with a tool that is more than capable of working with difficult and intricate materials.

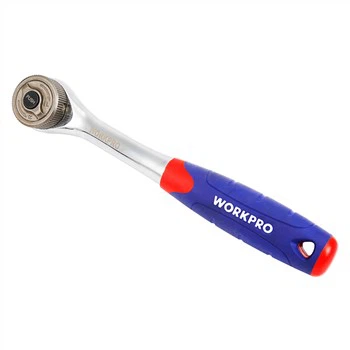
Click for more: WORKPRO Sausage Caulking Gun
In some cases, a low thrust ratio limits the amount of work that can be done. The temperature in your area is another aspect that will influence the thrust ratio of your caulking gun. If you reside in a colder climate, you should obtain a unit with the highest thrust ratio available.
Drip-Free - this is an absolute must. A sausage caulking gun that drips excessively creates a lot of mess, which adds to the amount of work that must be done. A drip-free unit ensures that the plunger that activates the cartridge to dispense the glue will be completely freed by the caulking gun. A drip-free pistol keeps the working area clean, and you save money on glue because it only dispenses when triggered.
Ease of Use - Because no one wants a cumbersome hardware tool, most tools are stand-alone and independent. The less difficult it is to use the caulking gun, the better it will perform for you. Choose units with a pleasant and smooth trigger as well as a device for adjusting the pace of the adhesive flow. If you can incorporate a rotating cartridge chamber, you are in for a real treat.
Comfortable to use - using a sausage caulking gun for lengthy periods of time can cause hand pain, and fatigued hands can't get the work done precisely. Look for a caulking gun with rubberized handles in the appropriate size to remedy this. This simple function can reduce the strain on your hands.
This is due to the frequent squeezing of the trigger as well as the various levels of force required. It does not ensure that your hands will not hurt, but it can offer some support and comfort.
Durability - Because every home improvement and repair tool is regarded as a great investment, it should last you a few years. Examine the materials employed in your prospective sausage caulking gun. Conduct thorough research on the product, including reading reviews and user feedback. You may be frugal, but if you buy a cheap product of poor quality, you will wind up spending more.
HOW TO LOAD A BULK CAULK GUN
First-time users of a bulk firearm are frequently frustrated. Why? Because it is challenging and requires practice. So, what are the keys to loading and dispensing bulk caulk successfully?

Maintain a clean procedure by always having solvent and rags on hand to clean the gun. Typically, producers of materials include their solvent recommendations for cleanup in the Spec Data or Technical Data Sheet.
Do not attempt to load the gun via the nozzle unless the sealant is thin and self-levelling. Always remove the cap and nozzle. Utilize the tool's open barrel end for loading.
Always ensure that your tool produces sufficient suction. Place your palm across the front of the barrel and pull the rod back to conduct a quick test. Your palm should seal against the barrel and a powerful pull should be felt. To ensure proper vacuum, we suggest:
The interior of the barrel must be free of any sealant residue and lightly lubricated. With our steel barrel equipment, you can use our Barrel Brush to clean the inside of the barrel. Wire brushes should not be used on Teflon-coated barrels. With Teflon-coated barrels, it is sufficient to add solvents to the interior of the barrel and flush it out with the piston by rapidly moving it up and down the barrel. The sealant that is wet or hardened should flake off. The same goes for firearms with aluminium barrels; no brass bristle brush.

The pistons may be cleaned without being harmed. Our bulk tools are constructed with leather pistons. Remove the pistons, clean them with a solvent, and then soak them in conventional motor oil. As with human skin, leather pistons will dry out when exposed to solvents (including water!), so "moisturize" them in oil until they become supple and flexible. After saturating and cleaning the pistons, reload them into the tool. For certain instruments with synthetic (Teflon or plastic) pistons, the only thing that can be done is to ensure that the edges are not damaged.
Preparing the pail: Numerous (Poly)Urethane and Silicone sealants are cured by moisture. They react with atmospheric moisture to cure into a rubbery condition. During the period that your pail is exposed to the air, the top surface of the material can cure or form skin. Reduce air exposure by using a Follow Plate or Skim Plate. When placing a plate on the sealant, begin with an edge, press it into the sealant, and then carefully flatten the plate. The objective is to remove all air between the subsequent plate and the sealant.
Reloading the device: There are a variety of common procedures for loading the gun. Utilizing a Loading Sleeve (with or without a Skim Plate) or a Follow Plate for direct loading. I will discuss each procedure.

Direct Loading: This is how the majority of pros load their equipment. To make cleanup easier, first apply a bond breaker (solvent, cooking spray, etc.) to the threads on the barrel end. Then, immerse the end of the barrel in the sealant for at least an inch, ensuring that the sealant contacts both sides of the barrel. Then, you slowly retract the rod and feel the sealant being drawn into the barrel by the vacuum. Develop a sense of the rod's resistance as you pull it back. Watch caution for air entering the rifle through the barrel. As the number of materials decreases, further, submerge the barrel in the pail. Once the firearm is loaded, remove the barrel and wipe it clean before replacing the barrel cap.
Loading Sleeve: By utilizing a loading sleeve, the barrel surface is covered and the filth is contained on the sleeve. This aids in keeping the firearm clean and expedites the procedure.

Follow Plate: As described above, you should consider employing the following plate made from a silicone-based polymer. To load the firearm, the firearm is placed on the gasket of the next plate. Now that the following plate and gun are unified, push down with the gun and pull back on the rod. This advances and retracts the material inside the gun.