The prospect of cutting marble is daunting for almost everyone, including seasoned do-it-yourselves. Not only is this project more challenging than most others, but any mistakes you make have the potential to render the pricey material useless. But fortunately, if you have the appropriate equipment and just a little bit of prior knowledge, this work that initially appeared to be challenging will become significantly more feasible. After you've finished reading this guide, you'll have a far higher level of self-assurance regarding your ability to cut marble. You'll be more than prepared to tackle the challenge when it comes around. Here is a step-by-step guide to cutting marble so that you don't waste money making mistakes.
What You Will Require
No tool is superior to a wet saw when it comes to cutting marble.
However, wet saws are expensive and specialized instruments, meaning most do-it-yourself do not own one. Therefore, if you do not own or have access to a wet saw, the circular saw is the tool that is considered to be the next best option.
This is everything you will need to get started:
• Circular Saw (Saw)
• The Diamond Knife
• Measurement Tape
• Masking Tape
• The Pencil of Grease
• Rigid Foam with a Thickness of 2 Inches
• Plywood in addition to two saw horses
Because you will be using a standard circular saw and not an actual wet saw, the vast majority of professionals, including The Family Handyman, advise establishing a do-it-yourself water source.
To keep your saw from overheating, you will require the following:
• Hose for the Garden (and a Water Supply)
• Clamps
In addition to that, the cut that is produced by utilizing this procedure typically has a jagged edge.
The following items will be necessary to round off the edge:
• Orbital Sander
• Sandpaper
Stay Safe
When cutting marble, as with any other do-it-yourself activity that involves the use of power tools, it is essential to have the appropriate protective gear on.
Protecting your eyes, ears, and hands with a robust pair of gloves and hearing aids is of the utmost importance. Investing in a set of coveralls for the workplace boosts your safety to an even higher level. Before making any cuts in the marble that you are working with, you should always make sure that the marble is placed on a stable surface.
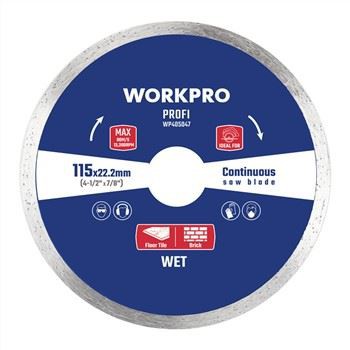
In most cases, the most effective configuration is the one that is described further down (two sawhorses with plywood and firm foam), but smaller pieces can be cut securely on the grass as well. Last but not least, keep in mind that you shouldn't attempt to cut large chunks of marble until you've honed your skills. Even Workpro suggests that you limit your cuts to just two inches and that you bring in the professionals for any greater cuts, particularly initial cutouts.
First Step: Get Ready to Make the Cut
When it comes time to cut your marble slab, thorough preparation will prove to be essential.
The first order of business is to position the marble slab. To make a sturdy work table, top two sawhorses with a sheet of plywood and secure it with screws. On top of the plywood, where it will be visible, I like to place a piece of stiff foam that is two inches thick. To prevent damage, this provides the marble with a cushioned surface to sit on top of.
Now, position the marble slab precisely where you want it on top of the firm foam. Without the use of this sawhorse configuration, it is possible to cut marble slabs into smaller pieces. On a flat patch of grass, you could, for instance, be able to cut the countertop for a small marble bathroom vanity. Making sure that you have accurate measurements is just as vital as ensuring that the stone is properly prepared.
The very first thing that I do is take some masking tape and seal off the edge that will be sliced. This decreases the likelihood that the edge of the cut marble will become damaged. After that, I make my marks and measurements directly on top of the masking tape. In the end, you should prepare your circular saw to cut. Because you are not employing a wet saw, you should position the garden hose in such a way that a very slight stream of water runs in front of the blade. I secure my hose with clamps so that it will not move as I cut.
* Always make sure that you cut the marble using a diamond blade that is designed for that purpose particularly.
The next step is to cut.
After everything has been correctly prepped, you may now begin making the cuts
Move the circular saw through the designated region slowly and carefully. Take all the time you need, and don't be in a hurry. Make sure that the water from the hose continues to drip over the front of the diamond blade so that it can remain cold throughout the whole cutting process.
Step III Sanding and finishing the edge constitutes.
There is a good possibility that the edge of the cut that you have just made will be somewhat jagged.
After that, remove the masking tape and use your orbital sander to make the edge as smooth as possible. You will want to start with a coarser sandpaper and work your way up to a finer one.
To achieve the nicest finish possible, I normally start with sandpaper that has a grit of 40 and work my way up to sandpaper that has a grit of 400.
Wet Sawing Is Another Method of Alternative
Cutting marble using a wet saw is a considerably more straightforward process. Not only are these power tools purpose-built to cut marble, tile, and other hard materials, but they also come equipped with a diamond blade that is cooled by water. Because it is cooled by water, the blade can be used without the need for a garden hose. Your slicing will become a lot less difficult and a lot more effective. If you don't want to invest in a wet saw for yourself, many hardware and home improvement companies let customers rent them for shorter or longer periods.
WORKPRO Marble Cutter

Click for more: WORKPRO Marble Cutter
This corded power tool is built to last and makes cutting tough materials a breeze. The 1250W motor allows you to work rapidly and efficiently, helping you to finish projects in record time. The 110mm blade is wide enough to cut through huge slabs of stone or tile, and the cutter is extremely precise, producing clean, exact cuts every time.
The 110mm 1250W Marble Cutter is an extremely powerful instrument that should be in the toolbox of every handyman. You can easily cut through marble, granite, and even hard ceramic tiles with its powerful motor.
One of the most important aspects of this power equipment is its safety. The design of the cutter guarantees that it is simple to use and that the cutting process is safe. The blade of the tool is protected by a guard that prevents debris and sparks from shooting out during the cutting process.
Overall, the 110mm 1250W Marble Cutter is a very adaptable and long-lasting power tool that can assist you with a variety of tasks. Whether you're a professional contractor or a do-it-yourselfer, this cutter is a must-have in your toolbox. So, add it to your toolbox and see how it may make your work easier, more efficient, and more precise.
A Few Parting Thoughts
There's no getting around the fact that learning how to cut marble can be nerve-racking. But if one has the appropriate resources and the necessary understanding, doing so is not difficult at all. Even if a wet saw is the most efficient instrument to use for the task at hand, how a circular saw is to be utilized to get the job done in a safe and timely manner as described above can be followed. Just keep in mind that you shouldn't make cuts that are any deeper than a few inches and that you should leave full-seam cuts to the professionals if you want to avoid cracking or shattering the marble slab.